Inside the Course: B&W Film Photography
Welcome to the second installment of “Inside the Course” where I give you an in depth look at a Vanderbilt course I’m currently taking. Today’s course is one I highly recommend: Arts 120: Introduction to B&W Photography.
In high school, I took AP 2D Design and focused my work around photography–it’s something I’ve always enjoyed. But I’ve also always worked digitally and have done a lot with my images in Photoshop, so when I had some free space in my schedule this semester, I decided I’d try out film photography.
Our class meets for 3 hours, two days a week and most of this time is spent as “lab time”. This means we get to do a lot of our work in class–particularly creating prints. In case you’re not familiar with film photography, let me give you a quick run through of the steps:
1. Load your film and take pictures. I don’t own a film camera, but thankfully Vanderbilt lets us borrow them for the semester. This class has definitely made me look into purchasing one.
2. Rewind film and take it out of the camera. In a completely darkroom, you open the film canister and roll your negatives onto a reel and then put them in a light-safe container. This is super tricky to do the first few times, particularly because you cannot see anything– cutting things in the dark is dangerous business.
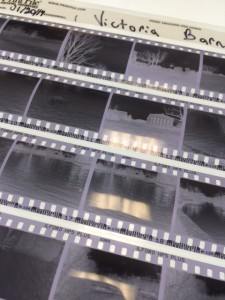
3. Process your negatives. This involves pouring and emptying a variety of chemicals into the light-safe container, some careful timing, and a bit of shaking around. Then you dry your negatives and cut them into strips which you put in a negative holder.

4. Print a contact sheet. You check the exposure with test strips before you print the whole sheet, and developing the sheet and test strips involves dipping them into different chemical baths for different amounts of time.
5. Make your prints! You use the enlarger to blow up and focus your negative, then run a few test strips to check your filter and exposure time, and finally make the print. After that, it stays on the drying rack for a day, and then the flattener for the day.
6. Mount your prints! You trim them, use this special mounting paper and iron mount them to white mounting board, and then retouch any spots in your image.
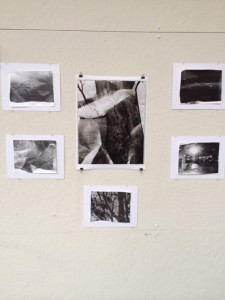
All that is a lot more than the digital process and it still amazes me how quickly we all learned it and got the process down. We have three core photo-based assignments (along with some readings and papers), and the most recent was the experimental image where we somehow had to break or mess with the standard process. For mine, I did this by crumpling the paper we print on before exposing it. Here’s what my prints ended up looking like:

This class is such a lovely break from much of my school work, and I feel like I’ve learned a ton! There’s something magical about watching the image appear on the paper as it’s developing and knowing that you very intentionally created it. I definitely recommend it if you’ve ever got free space in your Vandy schedule.